New Home Cleaning Made Easy: Your Move‑In Checklist & Post‑Construction Guide
- Nicholas Menezes
- Dec 11, 2025
- 11 min read

Moving into a newly built or renovated home is exciting — but a final, thorough clean is what makes the space healthy, safe and truly ready to live in. This guide breaks down what “new home cleaning” looks like after construction and for move‑ins: from removing large debris to eliminating fine dust and sanitizing high‑touch areas. You’ll find room‑by‑room priorities, practical checklist steps, recommended tools and eco‑friendly product options, rough timing, and how to prepare floors, windows and HVAC vents before the movers arrive. The article also outlines standard post‑construction stages, surface care tips, and answers common timing and scope questions. When you’re ready, the guide explains how to request a professional quote or schedule service to simplify your move‑in.
Why have a professional new home clean before you move in?
A professional new home clean focuses on removing construction residues, cutting airborne dust and sanitizing the spots you’ll touch every day. Crews use industrial‑grade filtration, top‑down cleaning workflows and proven disinfecting methods that catch both visible debris and the invisible fine dust ordinary cleaning can miss. The result: better indoor air quality, fewer allergens, and fewer physical and chemical hazards left behind — all of which make your home safer and move‑in ready. Below are three quick, practical benefits of hiring pros so you can see the immediate value.
Why hire professionals for new home cleaning?
Cleaner air — they remove construction dust and fine particles that can worsen allergies and breathing issues.
Safer move‑in — crews clear nails, sticky residues, paint splatters and other hazards before people and boxes arrive.
Time‑saving and thorough — trained teams, specialist equipment and checklists help make sure nothing is missed.
Those benefits lead naturally into the specific health and safety improvements a deep clean delivers and how professional protocols reduce risk for new homeowners.
How does deep cleaning improve health and safety in a new home?

Construction dust and leftover materials create fine airborne particles, allergens and chemical irritants that lower indoor air quality and can trigger respiratory symptoms. Professionals use HEPA filtration and targeted sanitizing to capture the tiny particles ordinary vacuums and quick dusting leave behind. That reduces inhalation exposure for sensitive people — kids, older adults or anyone with asthma. Sanitizing high‑touch points also lowers infection risk, and removing larger debris prevents cuts or trip hazards during move‑in. That’s why post‑construction cleaning zeroes in on vents, high ledges and hidden spots where dust builds up, which brings us to how crews stay efficient and thorough.
How do professional teams save time and make sure everything’s done right?
Professional crews work in parallel with clear checklists and task roles, so a multi‑person team cleans faster and more completely than one person working alone. They use air scrubbers, HEPA vacuums and commercial polishers to pull dust from ceilings, vents and HVAC runs — speeding the job while improving results. Checklists and inspection steps make coverage consistent: kitchens, bathrooms, windows and floors are rechecked until they meet move‑in standards. With that in mind, the next section walks through the step‑by‑step post‑construction sequence pros follow to hand you a clean, safe home.
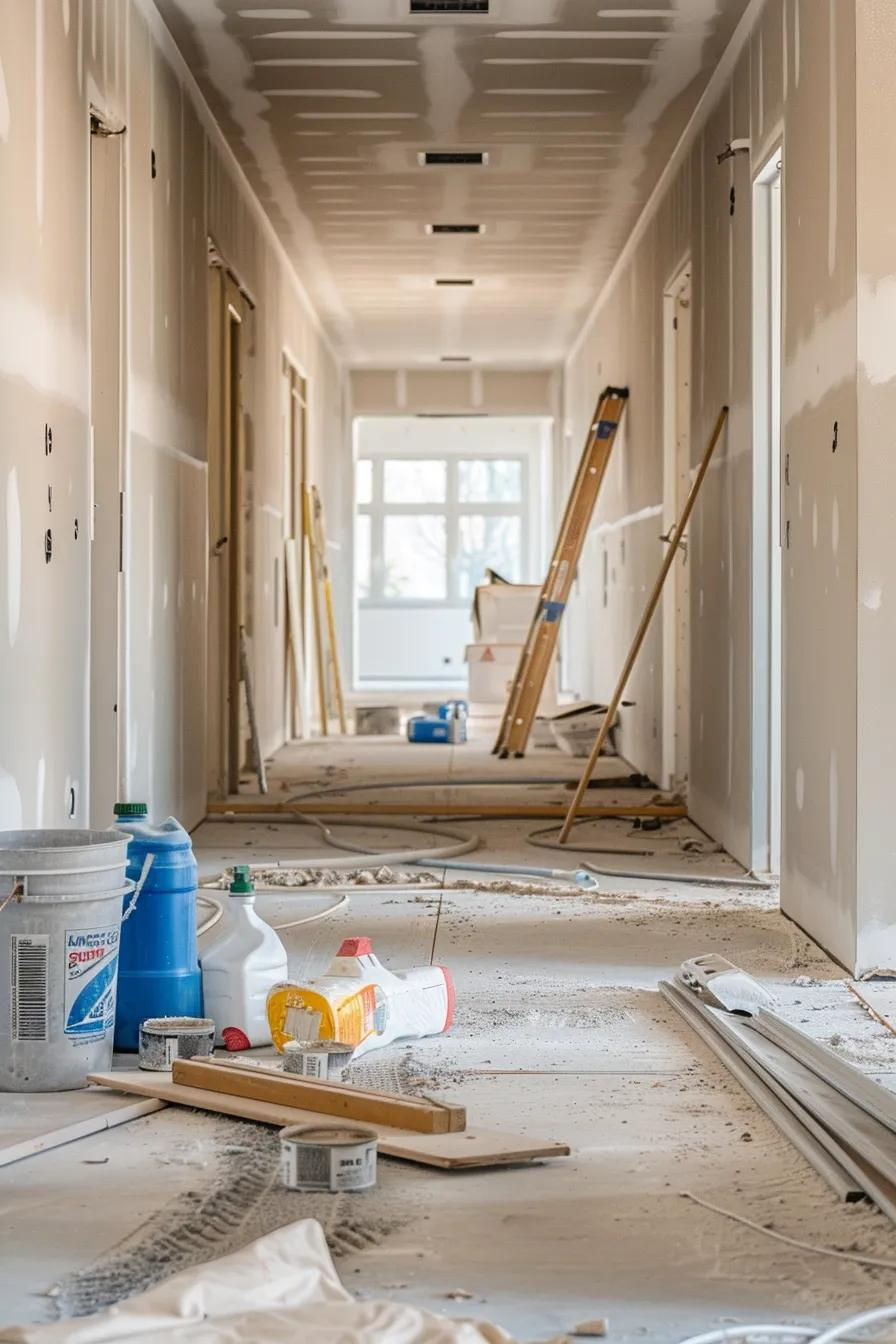
What are the key steps in post‑construction cleaning for new homes?
Post‑construction cleaning is a staged workflow: remove coarse debris first, then tackle fine dust, follow with targeted sanitization and finish with a quality inspection. The work runs top‑to‑bottom and outside‑in — large debris clears the way, high surfaces and HVAC are de‑dusted, fixtures and appliances are cleaned, and final polishing and checks confirm move‑in readiness. The ordered list below shows the standard steps crews use to keep work efficient and predictable.
Initial debris removal and coarse cleaning: Remove leftover materials, packaging and large debris so crews can work safely and tools don’t clog.
Deep dust removal and filtration: Use HEPA vacuums, air scrubbers and microfiber techniques to capture fine dust from ceilings, vents and horizontal surfaces.
Detail cleaning of kitchens and bathrooms: Clean countertops, fixture bases and appliance interiors; follow disinfectant dwell times where required.
Final touch‑up and inspection: Polish fixtures, clean glass and perform a checklist walkthrough to confirm everything’s ready for move‑in.
Those steps tie the methods to the tools crews rely on — the short table below pairs common tasks with the equipment and expected results.
Task | Equipment | Expected Outcome |
Debris removal | Heavy‑duty trash containers, push brooms | Safe, accessible work areas; nails and packaging removed |
Fine dust extraction | HEPA vacuums, air scrubbers, microfiber cloths | Lower airborne particulates and improved indoor air quality |
Surface sanitization | Non‑toxic disinfectants, microfiber, proper dwell time | High‑touch areas free of residues and pathogens |
Final inspection | Inspection checklist, touch‑up supplies | Verified move‑in readiness and cosmetic finish |
This quick reference shows how the right gear produces reliable results and sets up the practical techniques for removing construction dust efficiently.
How do pros remove construction dust and debris efficiently?
Efficient dust removal starts with the right order: work top‑to‑bottom so fine particles don’t settle back on cleaned areas. HEPA‑rated vacuums and air scrubbers filter submicron particles that standard vacuums can re‑release, and microfiber traps dust instead of smearing it. Crews contain and dispose of coarse debris in sealed bags and dedicated bins to limit cross‑contamination between rooms and protect HVAC systems. That focus on filtration and containment comes before detailed sanitizing, which is especially important in kitchens and bathrooms.
Best practices for sanitizing new bathrooms and kitchens
Sanitizing kitchens and bathrooms combines mechanical cleaning with the right disinfectants and correct dwell times. Start with a detergent wash to remove film and soil, then apply a compatible sanitizer to sinks, faucets, counters, toilets and appliance handles, following label instructions for effectiveness. Don’t forget hidden spots under fixture bases, inside ovens and grout lines — attention there prevents lingering contamination and makes the space ready for food prep and personal care. These steps lead into the move‑in checklist and finishing tips below.
How to prepare your new home for move‑in: essentials and tips
Preparing for move‑in mixes checklist cleaning with scheduling and protection to avoid damage during the move. Move‑in prep means room‑by‑room cleaning, protecting surfaces where movers will go, and final air‑quality steps so your family walks into a healthy home. The payoff: fewer post‑move chores and less risk of stains or damage to new floors and fixtures. Use the concise room checklist below yourself or expect these items from a professional service.
Room‑by‑room move‑in checklist:
Kitchen: Clean inside appliances, wipe cabinet interiors, sanitize countertops and polish fixtures.
Bathrooms: Scrub tubs and showers, sanitize toilets and sinks, and clean grout and drains.
Living areas & bedrooms: HEPA‑vacuum baseboards, vents and light fixtures; wipe and dust surfaces.
Following this checklist helps prioritize work before movers arrive and leads into the final polishing that gives a finished, show‑ready look.
Final touches: polishing fixtures and surfaces
Final polishing is all about visible details that make a home feel finished: buff stainless steel, remove film from appliances, polish chrome and clean light fixtures so they sparkle. Use non‑abrasive polishes and microfiber cloths to avoid scratches — for stainless steel, polish with the grain for a consistent finish. Check hardware and switchplates for fingerprints or sticky residue and remove any sticker glue left from construction. These cosmetic steps help the home look and smell fresh, which brings us to odor removal and air quality.
How to remove odors and freshen air in a new home
Effective odor removal targets the source — paint off‑gassing, adhesives and construction materials — rather than covering smells with heavy fragrances. Increase ventilation and rely on activated carbon or HEPA filtration to cut VOCs and particulates. Portable air scrubbers with charcoal filters and scheduled cross‑ventilation speed up chemical‑smell clearing; safe fabric neutralizers can help if odors persist. Avoid strong perfumes that can irritate sensitive noses — prioritize filtration and source control to create a neutral, healthy baseline for living spaces.
Which cleaning tasks matter most for floors, windows and surfaces?
Different materials need different care to remove residues while protecting finishes. The rule is material‑aware cleaning: sweep and HEPA‑vacuum before wet work on floors; remove paint and drywall film from glass with safe scrapers, then finish with a squeegee and microfiber. The result is clean, protected surfaces that withstand moving and daily use. The table below outlines common surface types, recommended treatments and protection timing to help plan final prep.
Surface Type | Recommended Treatment | Protection / Timing |
Hardwood floors | Sweep, HEPA vacuum, pH‑balanced wood cleaner; avoid excess water | Use temporary floor protection for movers; wait manufacturer cure times before final finishing |
Tile & grout | Sweep, mop with neutral cleaner, treat grout with a brush and seal when ready | Seal grout after curing; protect floors during move‑in with boards or rosin paper |
Carpet | HEPA vacuum, spot clean with enzyme‑safe cleaners, consider professional steam if needed | Use runners during move‑in; schedule a deep clean after heavy dust exposure |
Glass & windows | Loosen residue with plastic scrapers and warm soapy water, then squeegee and towel dry | Clean interior and exterior after dust removal; postpone high exterior work for safety |
This comparison clarifies how to protect materials and leads into practical dos and don’ts for floors and windows.
How should floors be cleaned and protected after construction?
Start by removing grit and debris that can scratch surfaces — sweep and HEPA‑vacuum thoroughly before wet cleaning. Match cleaners to the floor type: pH‑neutral wood cleaner for hardwood, neutral tile cleaner for ceramic, and manufacturer‑approved products for laminates. Avoid ammonia and harsh solvents that strip finishes. For move‑in protection use rosin paper, reinforced cardboard or builder board on high‑traffic routes to guard against dents and stains. These precautions help avoid repairs and lead into window and glass cleaning techniques for new builds.
Window and glass cleaning techniques for new builds
Cleaning windows in new builds means removing paint splatters and drywall dust without harming coatings or seals. Use plastic scrapers and warm soapy water to loosen residue before squeegeeing. Work top‑to‑bottom to prevent drips and streaks, and finish with microfiber towels and a quality squeegee for streak‑free glass. For exterior or high windows, prioritize safety and consider hiring professionals to avoid ladder work. With the glass handled, the next section covers sustainable cleaning choices.
How does eco‑friendly cleaning improve new home services?

Eco‑friendly cleaning means using products and methods that lower chemical exposure while still delivering sanitization and cosmetic results. Plant‑based detergents, hydrogen peroxide‑based sanitizers and microfiber tools remove soils and inactivate microbes without leaving persistent toxic residues — which helps maintain better indoor air quality over time. Benefits include safer spaces for children and pets, reduced environmental impact, and alignment with values common in the Lower Mainland. The table below compares common green approaches with their environmental and safety advantages.
Product / Approach | Environmental Attribute | Benefit / Safety |
Plant‑based detergents | Biodegradable, low VOC | Effective cleaning with less aquatic toxicity |
Hydrogen peroxide sanitizers | Breaks down to water and oxygen | Broad antimicrobial action without persistent residues |
Microfiber systems | Reusable, reduce chemical need | Mechanically trap soils and lower chemical use |
Enzyme cleaners | Biologically active formulas | Target stains gently without harsh solvents |
This table shows eco‑conscious choices can meet sanitization goals while reducing long‑term exposure — useful when choosing products for new home work.
Which eco‑friendly products are used for new home sanitization?
Common green options include hydrogen peroxide‑based disinfectants, plant‑derived detergents and microfiber tools that lift and remove dirt with less chemical reliance. Hydrogen peroxide is effective against many microbes and breaks down into harmless byproducts when used as directed. Microfiber cloths remove dust and pathogens with less liquid, and enzyme spot cleaners handle organic stains without aggressive solvents. Homeowners should look for low‑VOC, biodegradable products and microfiber systems to balance cleaning performance with occupant safety.
Why pick green cleaning for your new home?
Green cleaning reduces exposure to VOCs and lingering chemical residues, which helps people who are sensitive — especially children and pets — and supports better indoor air quality. It also aligns with sustainability values common in our region. When protocols and dwell times are followed, eco‑friendly methods can deliver the same surface cleanliness and disinfection as conventional approaches. Knowing this helps you decide whether to request green methods when you get a professional quote.
Common questions about new home cleaning
This FAQ section gives short, practical answers to help you plan and prioritize cleaning before moving into a new or renovated home. It covers scope, timing and how to get the right professional help so you can request an accurate quote for your situation.
What should be cleaned in a new house before moving in?
Focus on kitchens, bathrooms, floors, windows, HVAC vents and high surfaces where construction dust gathers — these areas affect health and daily use. In the kitchen: appliance interiors, cabinet interiors and countertops. In bathrooms: grout, fixture bases and drains. Floors should be cleared of grit and HEPA‑vacuumed before any wet cleaning; windows and light fixtures need film and residue removed to stop dust from redistributing. For full coverage, consider a professional post‑construction clean that includes vent cleaning and a final inspection.
How long does it take to deep clean a new home?
Timing depends on home size, construction stage and how much debris there is. A typical 2–3 bedroom home with light finishing dust often needs 4–8 hours for a focused deep clean. Heavy post‑construction jobs can take 1–3 days depending on crew size and remediation needs. HVAC cleaning, extensive paint or adhesive removal, or appliance interiors can add time. Professionals give the most accurate estimate after an on‑site visit or photo review, and many offer evening or Saturday slots to match your move‑in plans.
For homeowners in the Lower Mainland who want reliable local help, Bubbly Cleaning Services Inc. offers tailored new home and post‑construction cleaning with eco‑friendly options and a satisfaction guarantee. Local crews follow construction cleaning workflows — debris hauling, HEPA‑filtered dust removal and surface sanitization — to prepare homes for safe occupancy and flexible scheduling, including evenings and Saturdays. If you’d rather hand off complex post‑construction cleaning or request a free quote to plan timing and costs, contact a provider in your area to check availability and options.
Professional workflows speed up the process: Debris removal, HEPA filtration and targeted sanitization give better air quality and safety.
Material‑appropriate methods protect finishes: Using the right cleaners and protections reduces damage during move‑in.
Eco‑friendly choices lower long‑term exposure: Safer products and microfiber tools support indoor air quality without losing effectiveness.
These quick takeaways summarize the main points and show the path from understanding tasks to hiring professionals and scheduling services.
Frequently Asked Questions
What should I consider when hiring a professional cleaning service for my new home?
Check their experience with post‑construction work, the products and methods they use, and their cleaning protocols. Ask if they offer eco‑friendly options, read customer reviews, and confirm insurance and satisfaction guarantees. Request a detailed quote that lists what’s included so you can compare providers and be clear about expectations.
How can I maintain cleanliness after the initial deep clean?
Set a simple routine: daily quick wipes and tidying, weekly vacuuming and mopping for high‑traffic areas, and monthly deeper tasks like dusting vents and baseboards. A no‑shoes policy helps reduce tracked‑in dirt. Air purifiers can also help maintain air quality and slow dust build‑up.
Are there cleaning products I should avoid in a new home?
Avoid harsh chemicals containing ammonia, bleach or high VOC solvents that can harm indoor air quality and irritate sensitive people. Also steer clear of abrasive cleaners that can scratch surfaces. Instead, choose biodegradable, low‑VOC products and check labels for compatibility with hardwood, stone and other special finishes.
What are signs my new home needs a professional cleaning?
Look for visible dust on high surfaces, lingering paint or chemical odors, debris in vents or behind appliances, or if household members have allergy or respiratory symptoms. If you want a thorough move‑in clean without the effort, hiring professionals is often the fastest, safest option.
How often should I schedule professional cleaning services?
Frequency depends on lifestyle, pets and foot traffic. Many households find a deep clean every 3–6 months works well. If you have young children, pets, or high use, more frequent maintenance (monthly or bi‑monthly) helps keep allergens and dust under control.
What should I do if I find construction debris after moving in?
Remove obvious debris promptly to keep the home safe. For fine dust, use a HEPA vacuum to limit airborne particles. If debris is extensive or you’re unsure how to clean it safely, call a post‑construction cleaning specialist — they have the equipment and experience to handle it properly.
Conclusion
A thorough new home clean is essential for a safe, healthy move‑in — it removes construction debris and allergens so your home is truly ready. Hiring professionals can improve indoor air quality, reduce safety risks and save you time. If you want a smooth, stress‑free move‑in, consider reaching out for a tailored cleaning plan today.


Comments